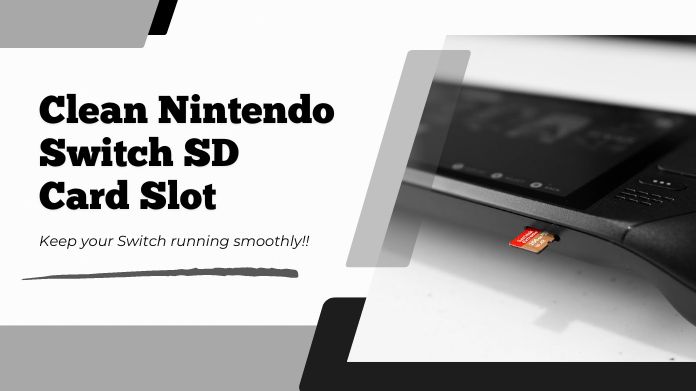
Have you ever wondered why your Nintendo Switch isn’t reading your SD card properly, even though everything looks fine?
If your games are loading slowly or your console isn’t recognizing the SD card at all, it might not be a hardware failure—it might be time to format the SD card, or there’s a good chance that dust/debris has made its way into the SD card slot.
We frequently ignore simple chores such as cleaning our Nintendo Switch SD card slots, yet even tiny upkeep can make a significant difference.
Just like you would not let dust accumulate inside your gaming console, the Nintendo Switch SD card slot demands some attention.
Keeping it clean ensures that your Nintendo Switch performs at its best and avoids unnecessary interruptions during gameplay.
We’ll walk you through the process of properly and effectively cleaning the SD card port on your Nintendo Switch in this article.
It can save you future problems and is easier than you might believe!
What You’ll Need to Clean the Nintendo Switch SD Card Slot?
The great thing about cleaning your SD card slot is that you likely already have most of the tools you need at home.
Here’s a simple list to get you started:
- Compressed air (optional but useful for cleaning off dust)
- Microfiber cloth (to gently wipe down your device)
- Soft-bristled brush (a cosmetics brush or something similar works well for getting into small spots).
- Cotton swabs (for precision cleaning).
- To safely clean electronics, use isopropyl alcohol at 90% or greater.
None of these items are particularly specialized, which means you don’t need to run out and buy any expensive gear.
The goal is to be gentle with your Nintendo Switch to avoid damage, and these materials are safe for use on electronics.
Step-by-Step Guide: How to Clean the Nintendo Switch SD Card Slot?
1. Power Off Your Nintendo Switch
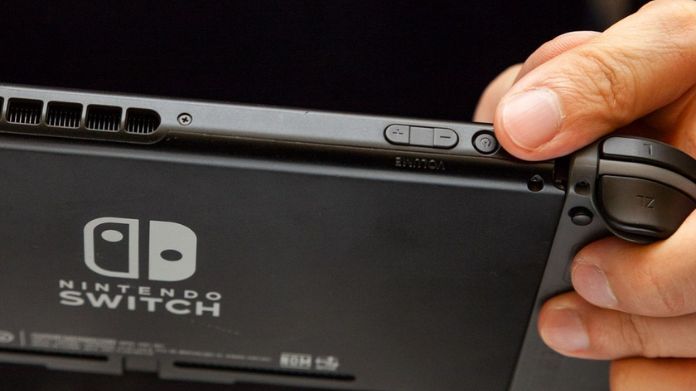
Before you start cleaning, turn off your Nintendo Switch completely. This step is critical because electronics are delicate, and cleaning while the device is powered on may result in short circuits or other damage.
Hold down the power button for a few seconds until the power options show, and then choose “Power Off.”
It may seem obvious, but neglecting this step can result in unnecessary hazards, and no one wants a fried console from a simple cleaning chore.
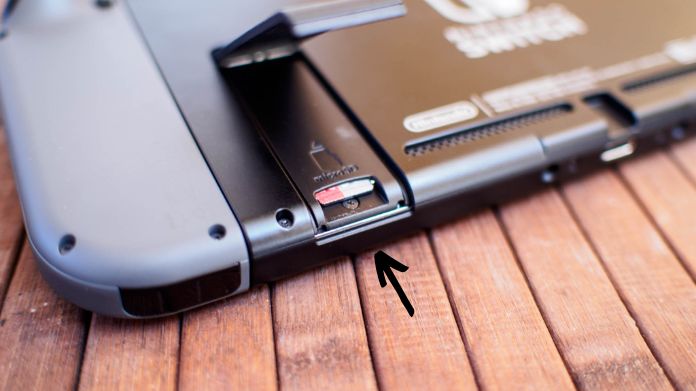
2. Remove the SD Card From the Slot

Next, gently remove the SD card from the Nintendo Switch. If the SD card appears to be dusty or dirty, use a microfiber cloth to gently clean it.
To avoid fingerprints or oils on the metal contacts, handle the card by its edges. Although it’s a basic part, take your time. In the process, you don’t want to bend or harm the SD card.
3. Use Compressed Air to Clean the Nintendo Switch SD Card Slot
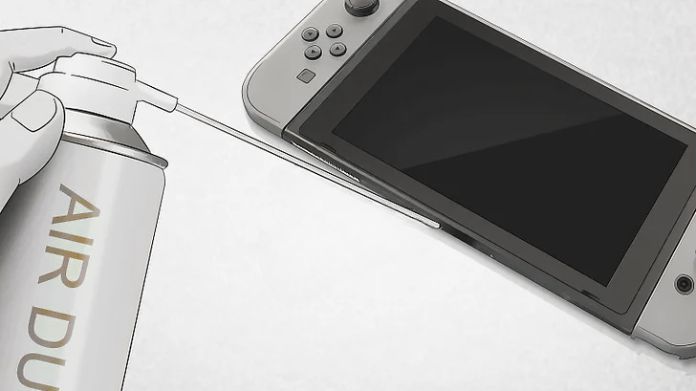
Now comes the first cleaning step. If you have a can of compressed air, use it to blow out any loose dust or debris from the SD card slot.
Hold the can upright, keeping it a few inches away from the slot to avoid damaging any internal components. Give it a couple of short bursts to clear out anything that might be stuck inside.
Be careful not to shake the can or hold it too near. Using compressed air incorrectly may result in moisture being blown into your equipment, something you should obviously avoid.
4. Use a Soft-Bristle Brush for Extra Cleaning
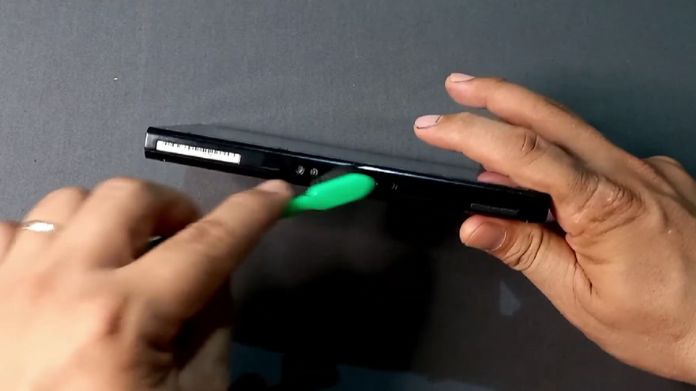
If the compressed air didn’t get everything out, grab a soft-bristle brush, like a makeup brush, and use it to gently clean the inside of the Nintendo Switch SD card slot.
A small brush is perfect for loosening any stubborn dirt that may be clinging to the edges.
This step is comparable to cleaning a fragile lens such as that of a camera or an optical glass; very gentle with some thoroughness.
Refer to brushing in gentle, light strokes so as not to cause harm to the delicate parts within the slit.
5. Clean the SD Card Slot With Isopropyl Alcohol and Cotton Swabs
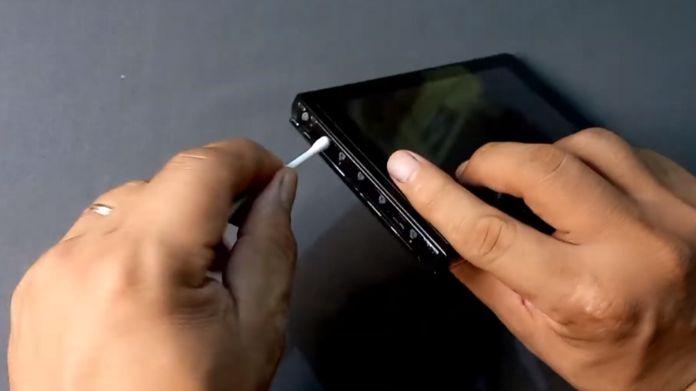
For a more thorough clean, you may want to use an isopropyl alcohol-soaked cotton swab on the tip as long as it is just damp.
Lightly swab the interior of your SD card slot to brush away any gluey or dirty buildup.
This is where you will need the Isopropyl alcohol, as it evaporates very fast and won’t leave moisture. This step will help eliminate any gunk that compressed air or a brush couldn’t get rid of.
Just be sure not to oversaturate the swab—less is more when it comes to cleaning electronics.
6. Clean the Surrounding Area of the Nintendo Switch SD Card Slot
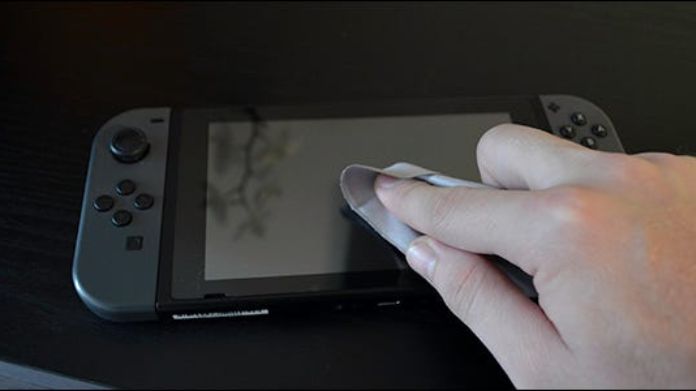
While you’re cleaning, make sure to clean the region around the Nintendo Switch SD card slot. Dust and debris can collect in the small crevices around the slot and might find their way inside if you don’t keep it clean.
To prevent future collection, wipe out the surface using a microfiber cloth or brush.
This simple action can make a big difference in keeping your Switch operating smoothly and clean.
7. Reinsert the SD Card and Power on Your Switch
After cleaning is complete and everything has dried, carefully replace the Nintendo Switch SD card into the slot.
Verify that it is not loose and fits snugly. When your Nintendo Switch has restarted, make sure the SD card is being read correctly.
Gameplay will be more smoother and faster loading times if everything goes according to plan and your Nintendo Switch recognizes the SD card with ease.
Why It’s Important to Clean the Nintendo Switch SD Card Slot Regularly?
You may not think about it very often, but cleaning your SD card slot on a regular basis will significantly improve your gaming experience.
Dust and debris might cause the SD card to not read properly, resulting in delayed loading times or even data damage.
A clean SD card slot means better performance, fewer hiccups while playing, and a longer lifespan for your console.
Even though it’s a simple procedure, include it in your routine Switch maintenance to avoid irritation later on.
Tips to Prevent Dust and Debris From Getting Into the Nintendo Switch SD Card Slot
Now that your SD card slot is clean, let’s talk about how to keep it that way! Here are some simple tips to prevent dust from building up again:
- Use a protective case: When you’re not using your Switch, store it in a case to keep it safe from dust and dirt.
- Avoid taking the SD card in and out frequently: The more you remove and reinsert the card, the more you expose the slot to dust.
- Keep your Switch in a clean environment: Try to avoid using your console in dusty or dirty areas, like outdoors or near open windows.
- Regular maintenance: Give your SD card slot a quick clean every few months with compressed air or a microfiber cloth to prevent future buildup.
Our Thoughts
You may think that cleaning the SD card slot on your console belongs to the list of ordinary tasks that every parent has to deal with rather enthusiastically.
Yet, this is one of those that can sorely impede the functioning of your console. Following the simple instructions here will help you extract dust and any debris from your SD card slot, and so avoid glitches when playing games or watching TV.
It is a good practice to remember that the comfort your Switch would also spare when next you feel the urge to play.
There are other tasks that can be conducted when solving SD card problems, such as cleaning the SD card slot, which might help mitigate any possible repercussions in the future.


